A distracting background can ruin an otherwise great photo: a messy room, a crowded street, a bland wall or a photobomber. The good news: you don't need Photoshop or editing skills to replace it. Here's how to change the background of a photo online, for free, in under a minute, plus ideas for which background to choose and tips to make the result look natural.
Step 1: Remove the old background
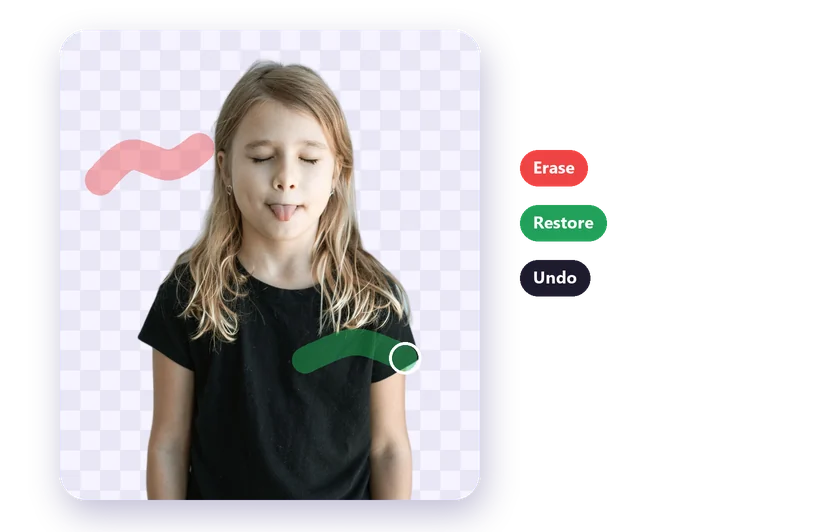
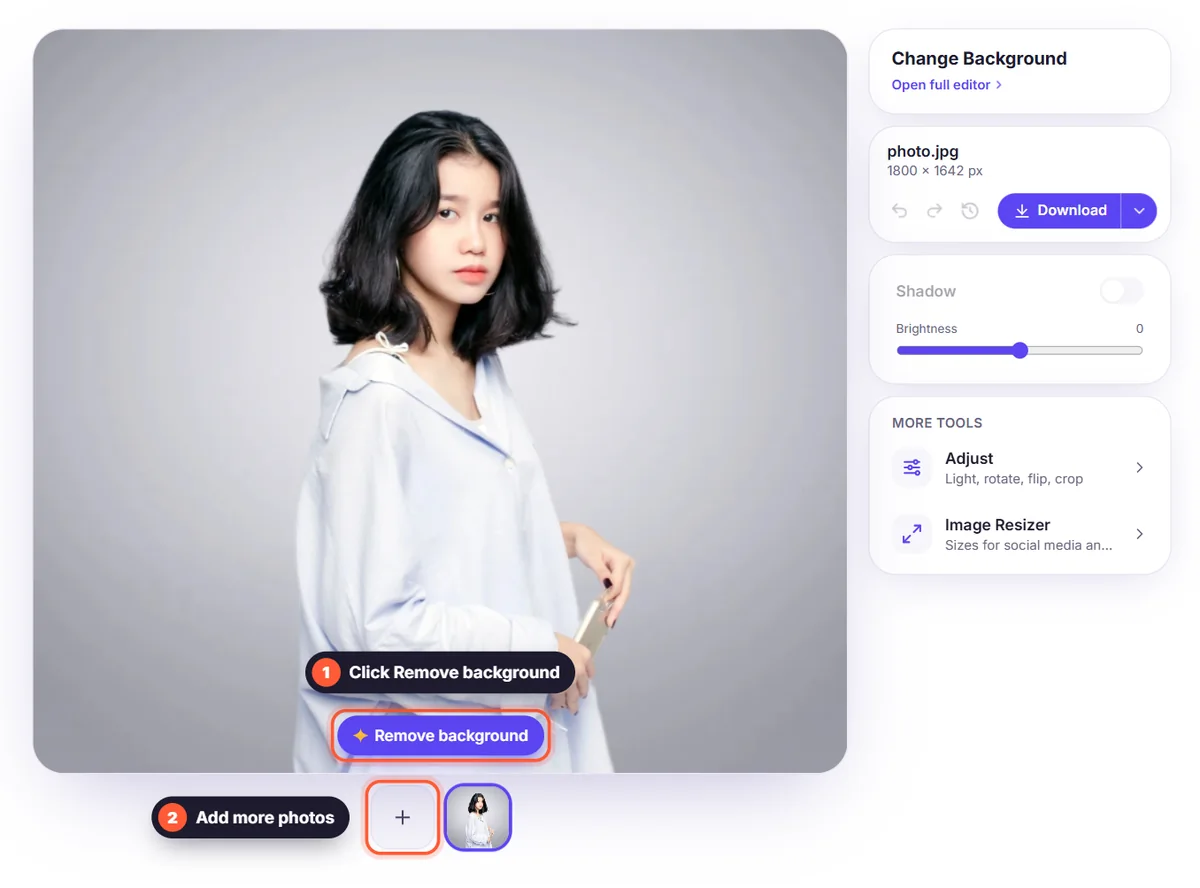
Upload your picture to our free background changer. JPG, PNG and WebP images up to 15 MB work, and you can also paste an image with Ctrl+V. Click Remove background and the AI cuts out the subject, hair and fine edges included, and shows it on a transparent checkerboard. For difficult photos, such as busy scenes, pets with fluffy fur or objects with many gaps, check the edges and fix any spot with the Brush.
Step 2: Pick a new photo background
Open Background in the editor's toolbar and choose a new background:
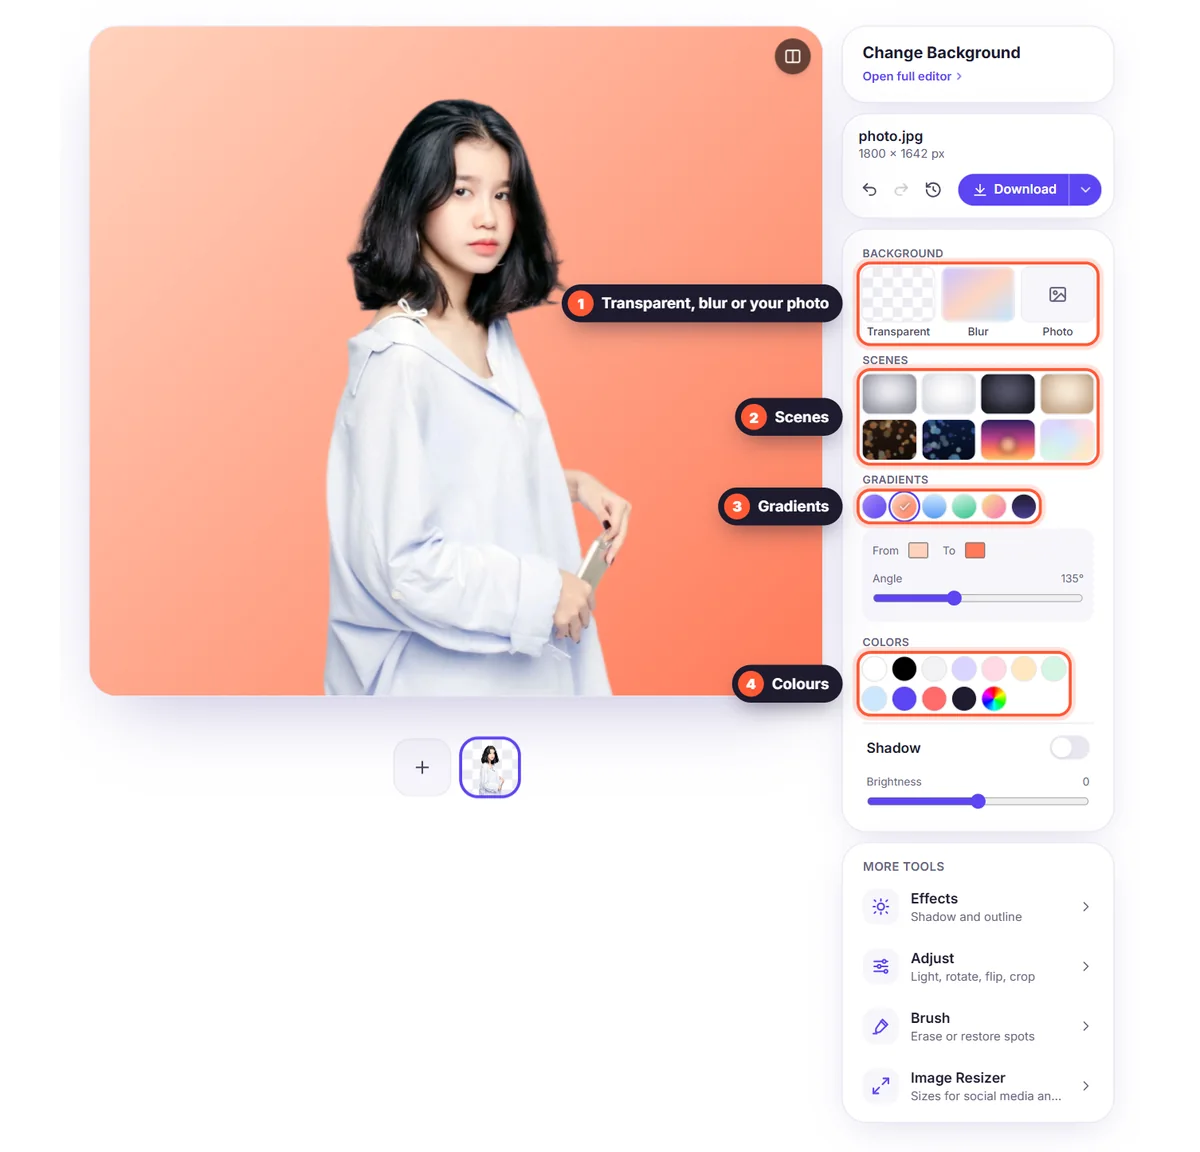
- Scene: a ready-made studio backdrop (grey, white, dark or warm), soft bokeh lights, a sunset or pastel colours, for a finished look in one click.
- Gradient: two colours that blend into each other; pick your own colours and angle.
- Colour: a solid background colour, from white or light grey to bold brand colours. You can also pick any custom colour and save your favourites.
- Blur: a softly blurred version of the original photo, for a professional portrait look. Drag the slider to set the strength.
- Photo: upload your own image, such as an office, a beach or a branded backdrop, to replace the background completely.
Step 3: Add depth with a shadow
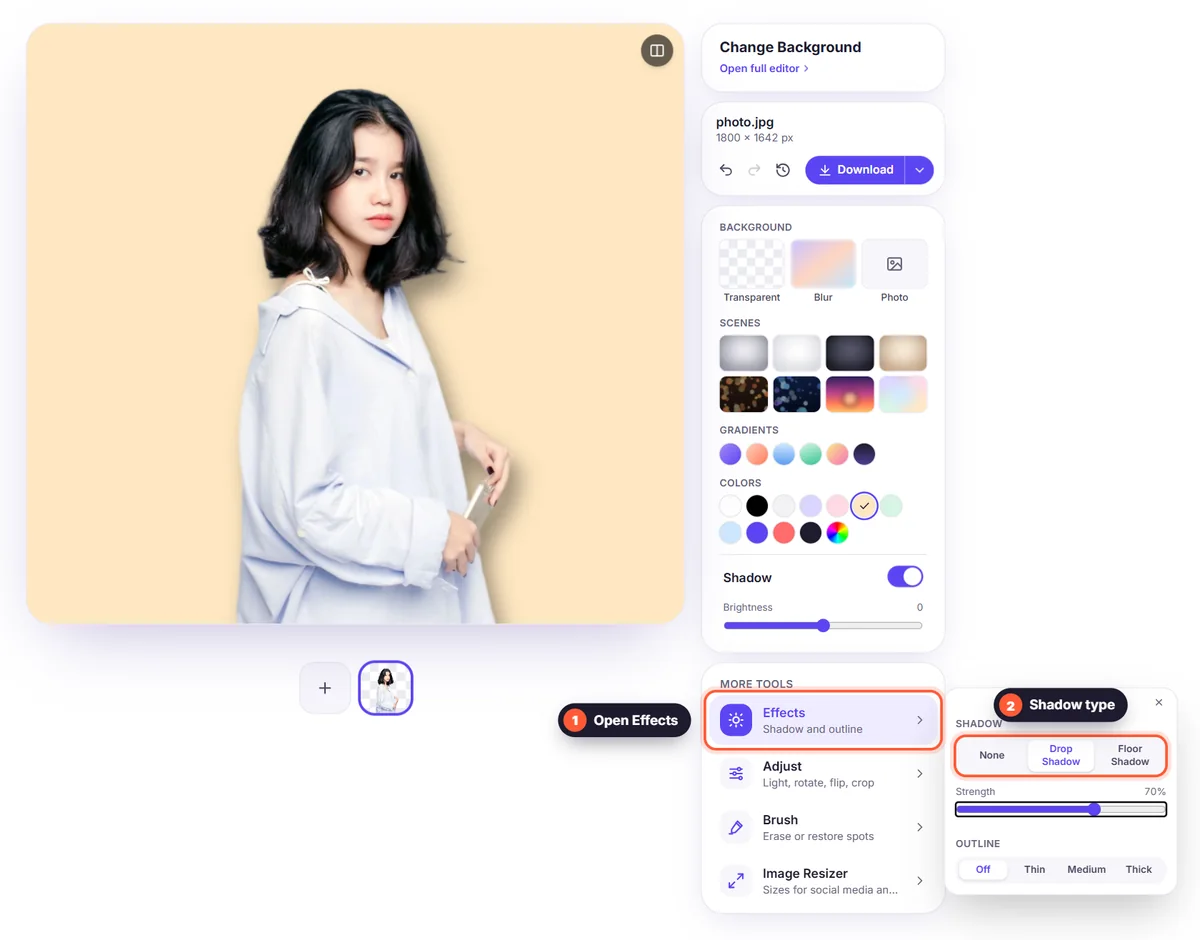
A cutout placed on a new background can look flat. Open Effects and add a Drop Shadow to lift the subject slightly off the background, or a Floor Shadow to make it stand on the ground, which is ideal for products and full-body photos. Adjust the strength until it looks subtle. For a playful sticker look, add an Outline in white or any colour.
Step 4: Adjust, crop and resize
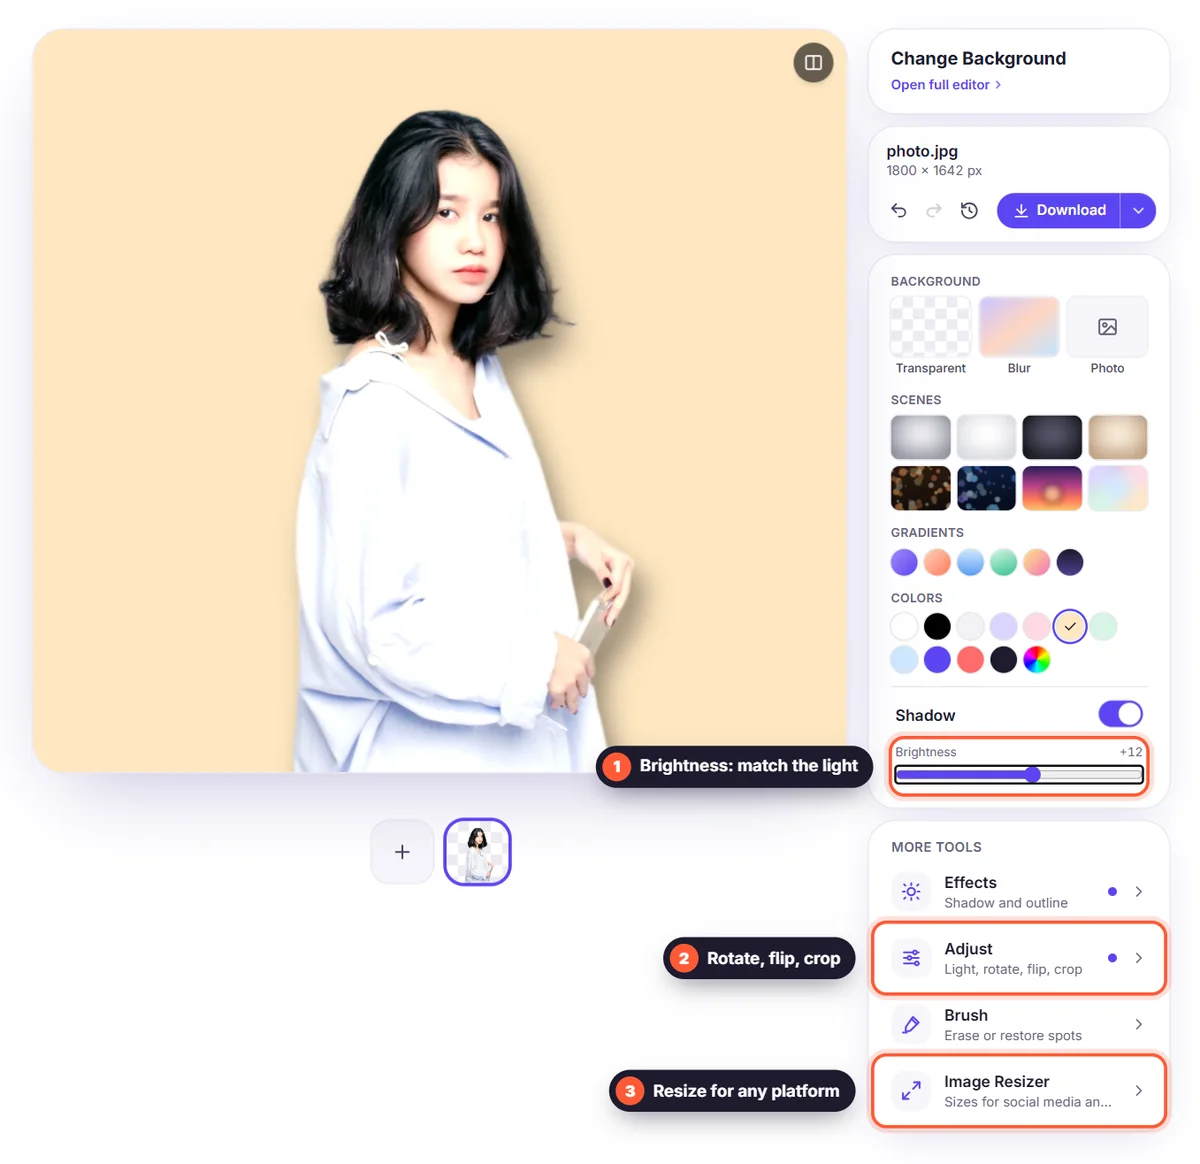
Open Adjust to match the subject to its new background: raise the brightness a little for a bright scene, or lower the saturation for a calm, neutral backdrop. You can also rotate, flip and Crop to subject. If the photo is for a specific place, open the image resizer and pick a ready-made size such as Instagram post, Story, YouTube thumbnail or Facebook cover.
Step 5: Download your new photo
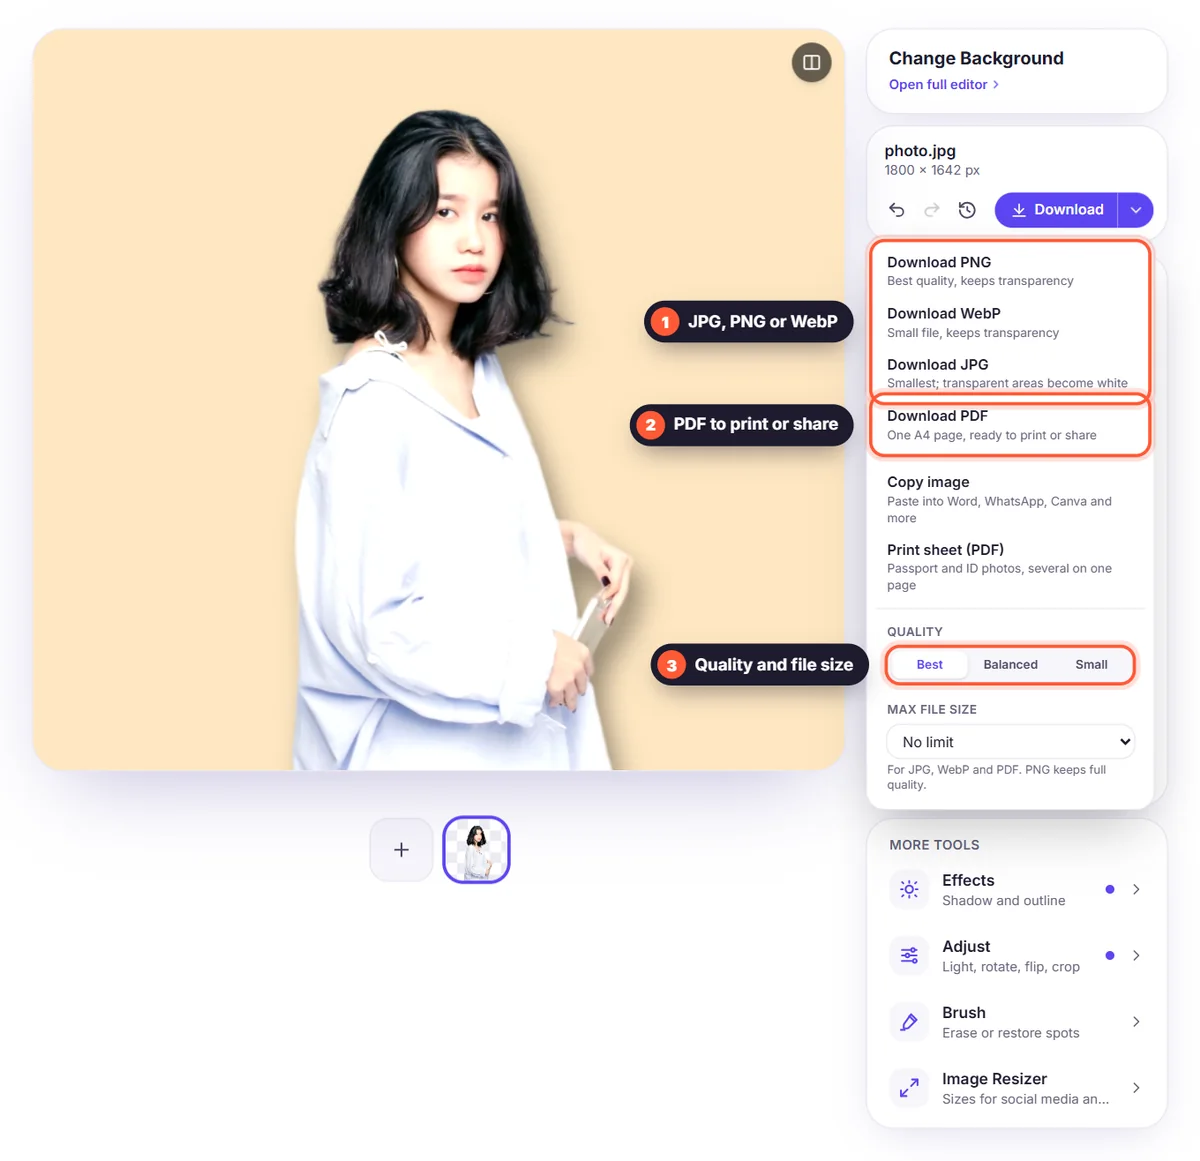
Download the result as JPG for the smallest file, as PNG or WebP, or as a PDF to print or share. Every change can be undone with the undo button, so feel free to try a few backgrounds before you save. Want to keep options open? Download a transparent PNG too, so you can add a different background later without starting over.
Which background colour or image should you choose?
- Profile pictures and CVs: a light, neutral colour or a gentle blur. See how to create a professional profile picture.
- Online shops: pure white or very light grey for consistent product photos. See product photos on a white background.
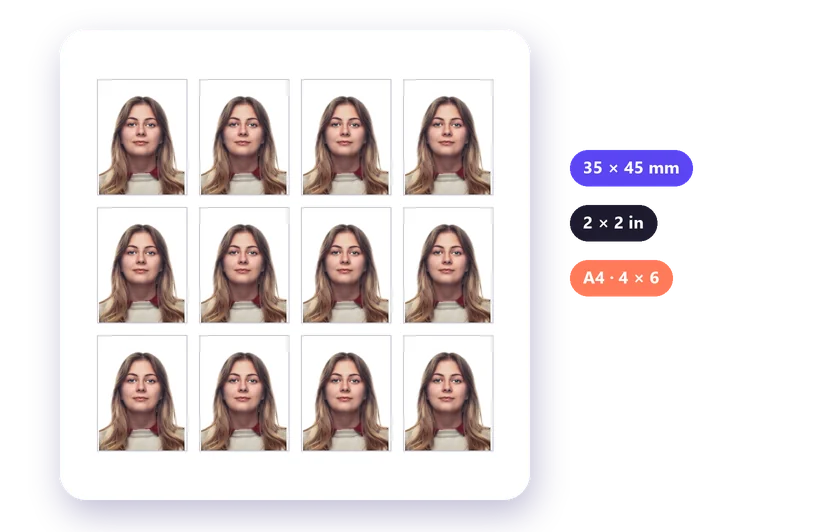
- Passport and ID photos: plain white or the colour your country requires. See the passport photo print sheet guide.
- Ads and social posts: your brand colour or a bold gradient that makes the subject pop.
- Fun edits: a completely new place. Match the direction of the light for a natural look.
Tips for a realistic background change
- Match the light: a subject lit from the left looks best on a background that is also lit from the left. Bright midday light on the subject won't fit an evening scene.
- Match the perspective: a photo taken at eye level needs a background seen from eye level. A subject shot from above looks wrong on a horizon view.
- Match the sharpness: if the background is very sharp and the subject slightly soft, blur the background a little, just like a real camera with a shallow depth of field.
- Match the colours: a warm, orange scene makes a cold, blue-lit subject look pasted. Use Adjust to bring the colours closer.
- Keep it calm behind the subject: avoid very busy images right behind the head or product.
Common mistakes to avoid
- Starting from a tiny or blurry photo: the cutout can't be sharper than the original.
- Leaving bits of the old background around the edges. Check by switching to a dark colour, then use the Brush to erase leftovers. See how to fix cutout edges.
- Placing the subject floating in mid-air without a shadow.
- Saving as JPG when you still need transparency for another design.
Change the background of many photos
Add several photos to the editor at once. Each one gets its own background and edits; switch between them using the thumbnails below the editor. When you're done, Download all saves every result in one ZIP file, or all of them in one PDF.
Background ideas by type of photo
- Portraits: a soft blur of the original photo, a Studio grey scene or a warm gradient look flattering and calm.
- Pets: a bright solid colour or pastel gradient makes fur stand out; add a white outline for a fun sticker.
- Products: white or light grey with a floor shadow for shops; a brand gradient for ads and banners.
- Cars and bikes: a clean studio backdrop or an outdoor photo with the same viewing angle.
- Group photos: a simple, light background keeps the focus on the people. Leave a little space around the group so that no one is cut off.
- Kids' drawings and crafts: a white or pastel background turns them into cards, prints and stickers.
Use the same background for a series
If the photos belong together, such as a team page, a product range or a set of social posts, use exactly the same background for all of them. Save your brand colours under Your colours in the Background panel, so you can pick the same shade every time with one click. Combine it with the same size in the image resizer and the same shadow strength, and the whole series looks professionally designed.
Keep a transparent copy
Before you download the final photo, also download a version with the Transparent background as PNG. With that copy, you can try other backgrounds later, in the editor or in any design tool such as Canva or PowerPoint, without removing the background again. It's especially handy for product photos and profile pictures that you'll reuse in many places, each with a slightly different background or size.
Frequently asked questions
Can I change the background of a photo for free? Yes. Removing the background, choosing a new one and downloading in full quality is free, with no account and no watermark.
Can I use my own image as the background? Yes. Choose Photo under Background and upload any image from your device.
Can I change the background on my phone? Yes, in any mobile browser. See how to remove a background on your phone.
How do I blur the background instead of replacing it? Choose Blur under Background and drag the slider. The subject stays sharp while the original background is softened.
Will the quality drop? No. You download the result in full quality; very large photos are scaled to 2,560 pixels on the long side.