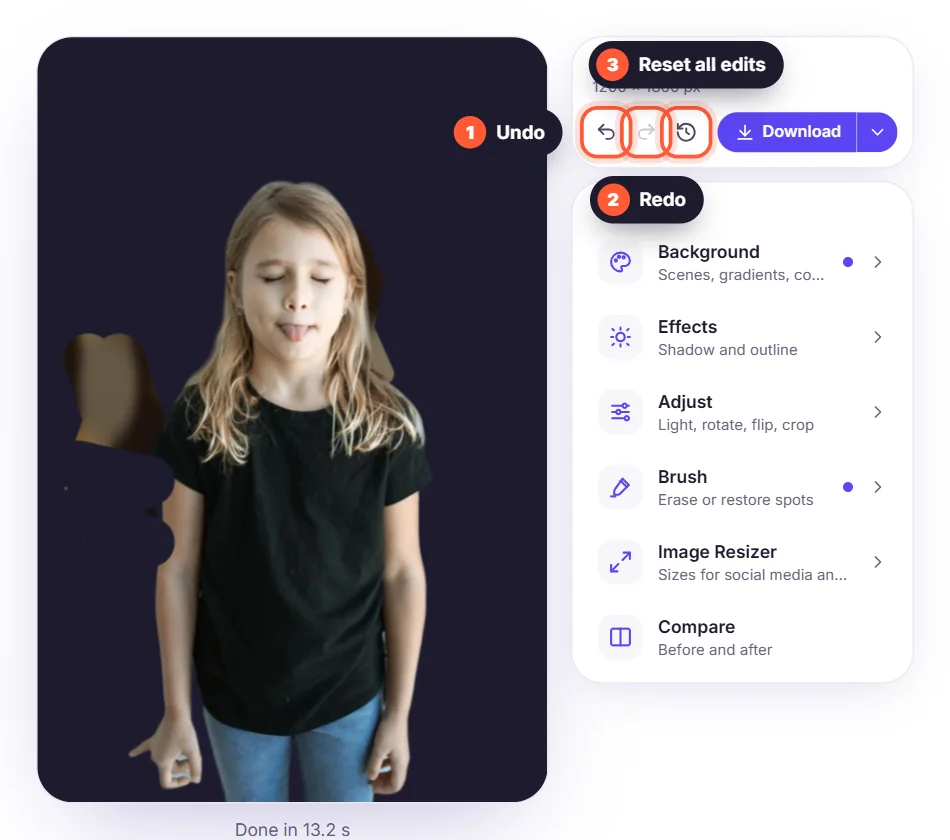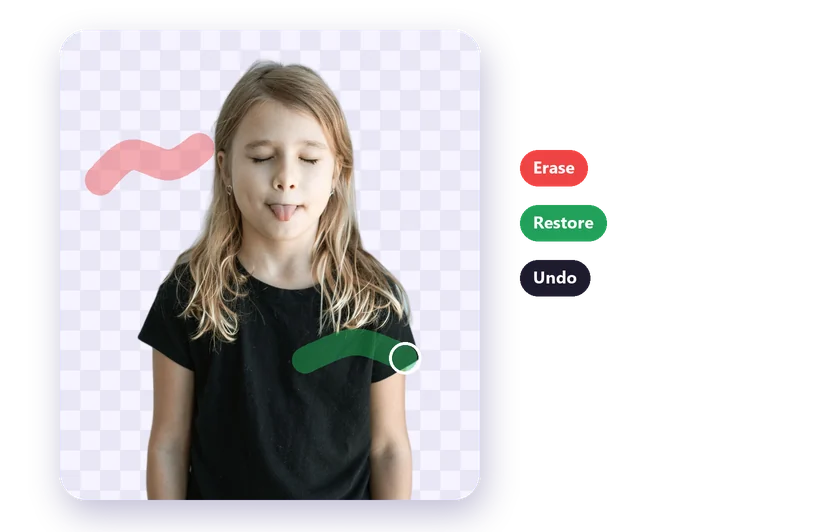
AI background removal gets almost every photo right, but sometimes a small piece of background stays behind, or a detail such as a strand of hair or a pen in a hand disappears. Instead of starting over, you can fix background removal mistakes yourself with the erase and restore brush.
How to fix background removal mistakes
- Upload your photo to the background remover and click Remove background.
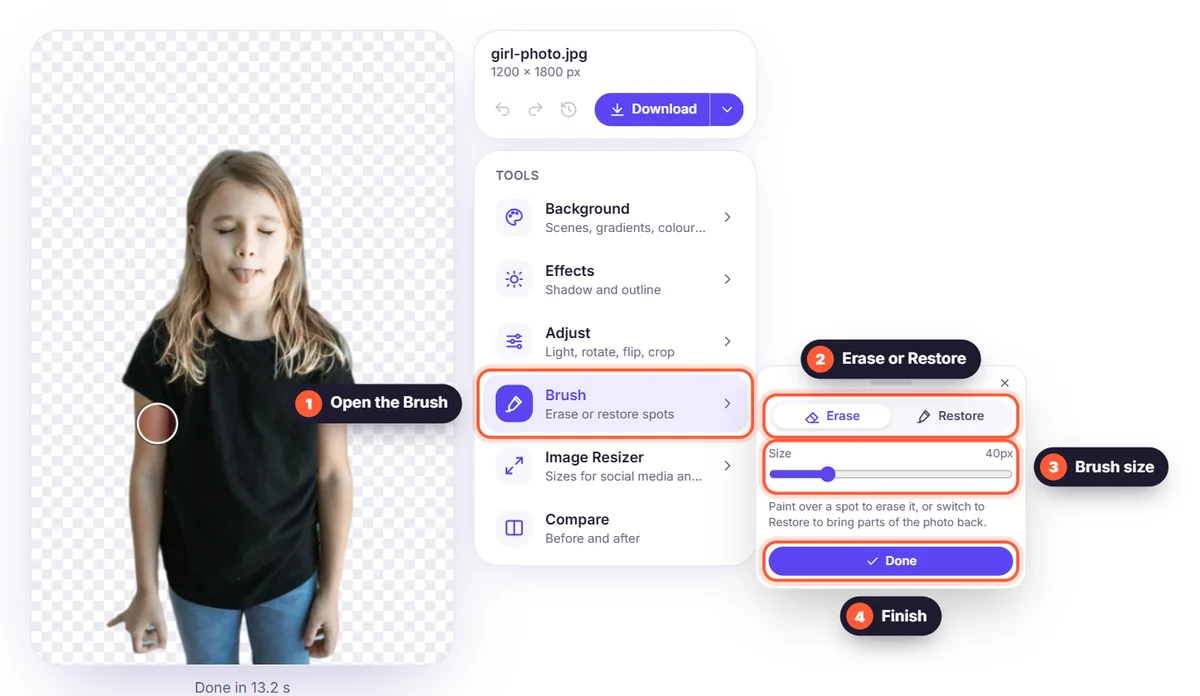
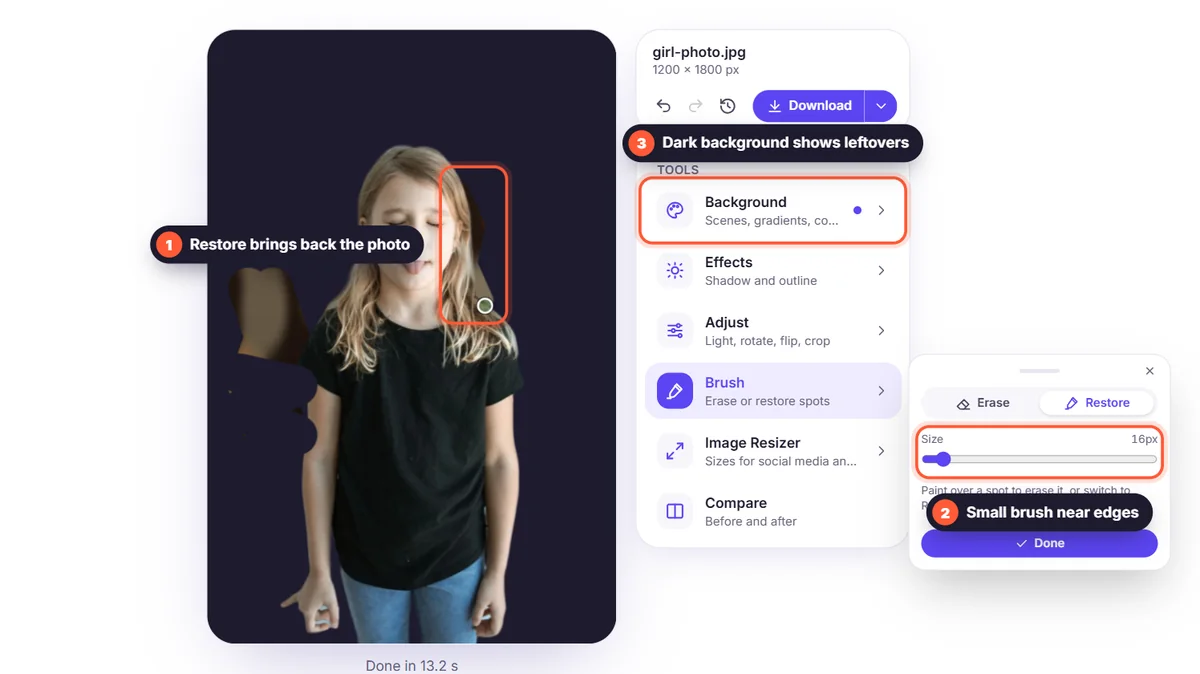
- Click Brush in the toolbar. A small bar appears with Erase and Restore.
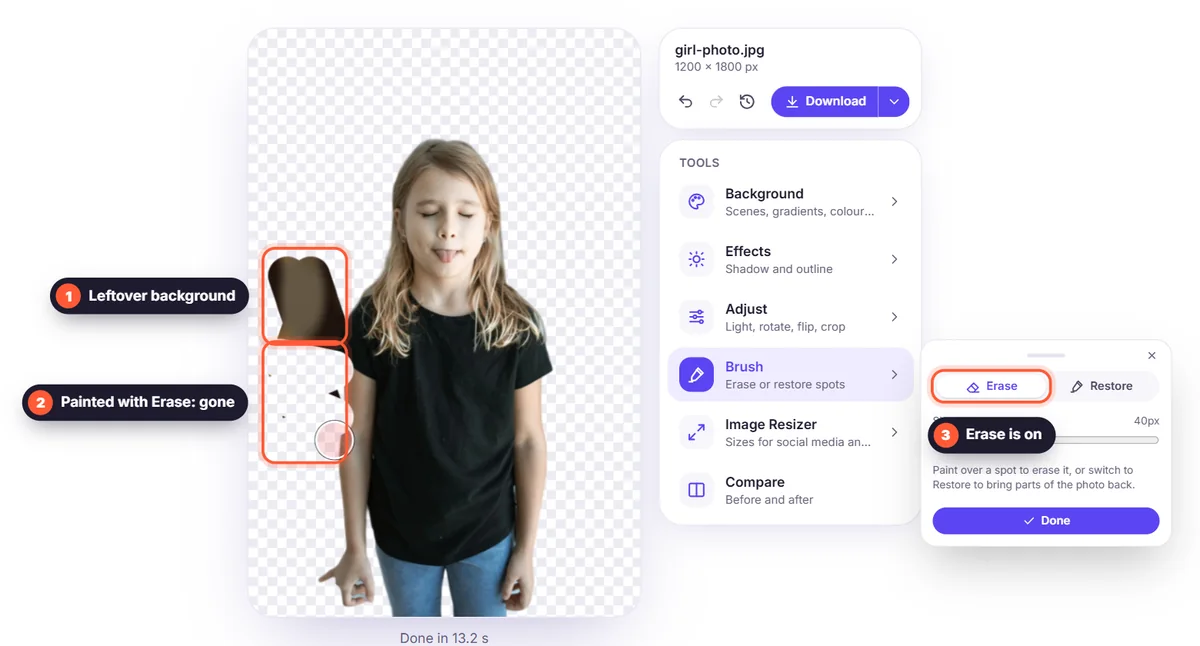
- Choose Erase and paint over any leftover background. It turns transparent right away.
- Choose Restore and paint over a part that went missing. The original photo comes back exactly there.
- Set the brush size with the slider, then click Done and download your image.
Erase or restore: which one do you need?
- Erase: a bit of the old background is still visible, for example between arm and body, or a shadow on the floor.
- Restore: something you wanted to keep was removed, such as a strand of hair, a glass, or the edge of a product.
Tips for clean edges
- Use a bigger brush for large areas and a small one close to the edge.
- Paint in short strokes: every stroke is one undo step, so a mistake is easy to undo with Ctrl+Z.
- Switch the background to a dark colour while you work: leftover pixels are much easier to see.
- For very fine hair, start from the sharpest, largest photo you have; it often saves you the touch-up.
Undo everything
Changed your mind? Reset to original removes all your edits and brings back the cutout exactly as it came from the background remover. Read more about why hair is hard to cut out and how to take photos for perfect cutouts.