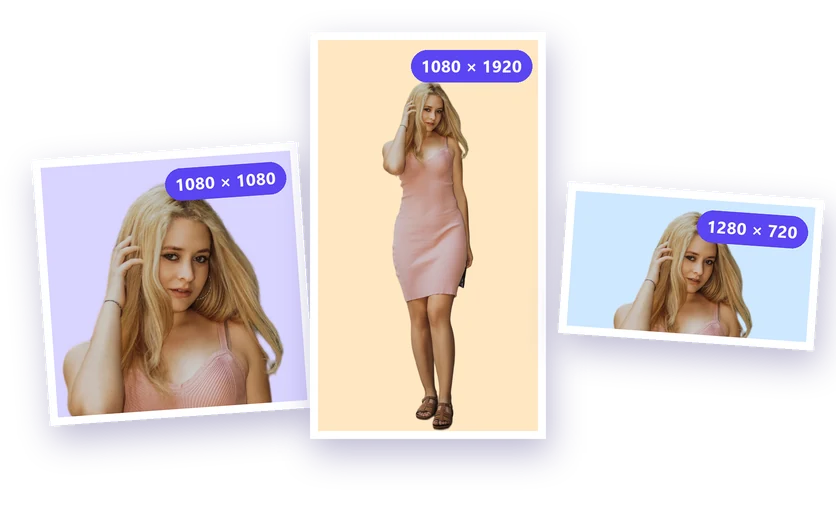
Most marketplaces and online shops recommend product photos on a plain white background. It looks professional, keeps your catalogue consistent and puts the focus on the product instead of your kitchen table. You don't need a studio, a light box or a photographer to do it. A phone, a window and a free background remover are enough. This guide covers the whole workflow, from taking the photo to exporting files that meet marketplace requirements.
Why a white background sells better
- Marketplace rules: Amazon requires a pure white main image, and many other marketplaces and shop themes are designed around white product photos.
- Consistency: when every product sits on the same background, your shop looks organised and trustworthy.
- Focus: nothing distracts from the product, its shape, colour and details.
- Flexibility: once the background is removed, you can reuse the same cutout on coloured banners, ads and social posts.
Step 1: Take the photo
Place the product on a table near a window, with some space around it. Any plain background works, because it will be removed anyway, but a light, single-coloured surface makes it easier for the AI to find clean edges. Fill most of the frame with the product, and keep the camera at the angle shoppers would naturally look at it from.
- Use daylight from a window, ideally on a cloudy day or with a thin curtain, for soft light without harsh shadows.
- Put a white sheet of paper or cardboard on the opposite side of the window to bounce light into the shadows.
- Turn off the room lights: mixing daylight with yellow bulbs gives strange colours.
- Use your phone's main camera, not the wide-angle or digital zoom, and tap the screen to focus on the product.
- Clean the product first. Dust and fingerprints show up clearly on a white background.
Step 2: Remove the background
Upload the photo to the background remover and click Remove background. The background is gone in a few seconds. For difficult items, such as glass, fur, plants, jewellery or products with many small gaps, check the edges and touch them up with the Brush.
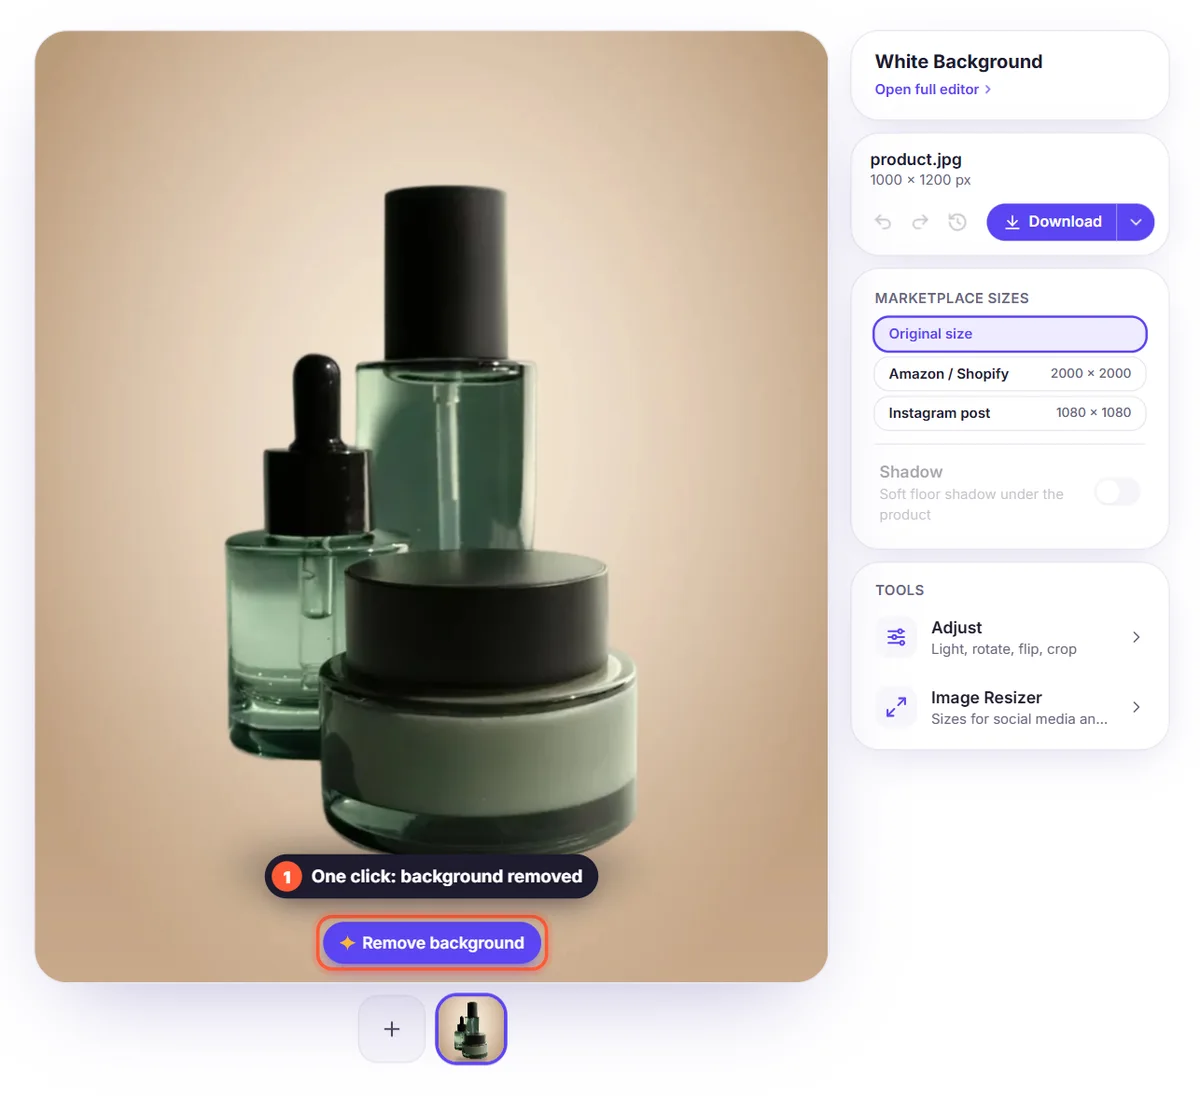
Check the edges by switching the background to a dark colour for a moment. If a small piece of the table remains, use the Brush in Erase mode to paint it away; if part of the product was removed, use Restore.
Step 3: Add a white background
In the editor, open Background and pick white. You can also choose any other colour that matches your brand, or a soft gradient for your own shop. To make the product look placed rather than pasted, open Effects and add a soft Floor Shadow: it makes the product stand on the white surface. A light Drop Shadow works well for flat products photographed from above.
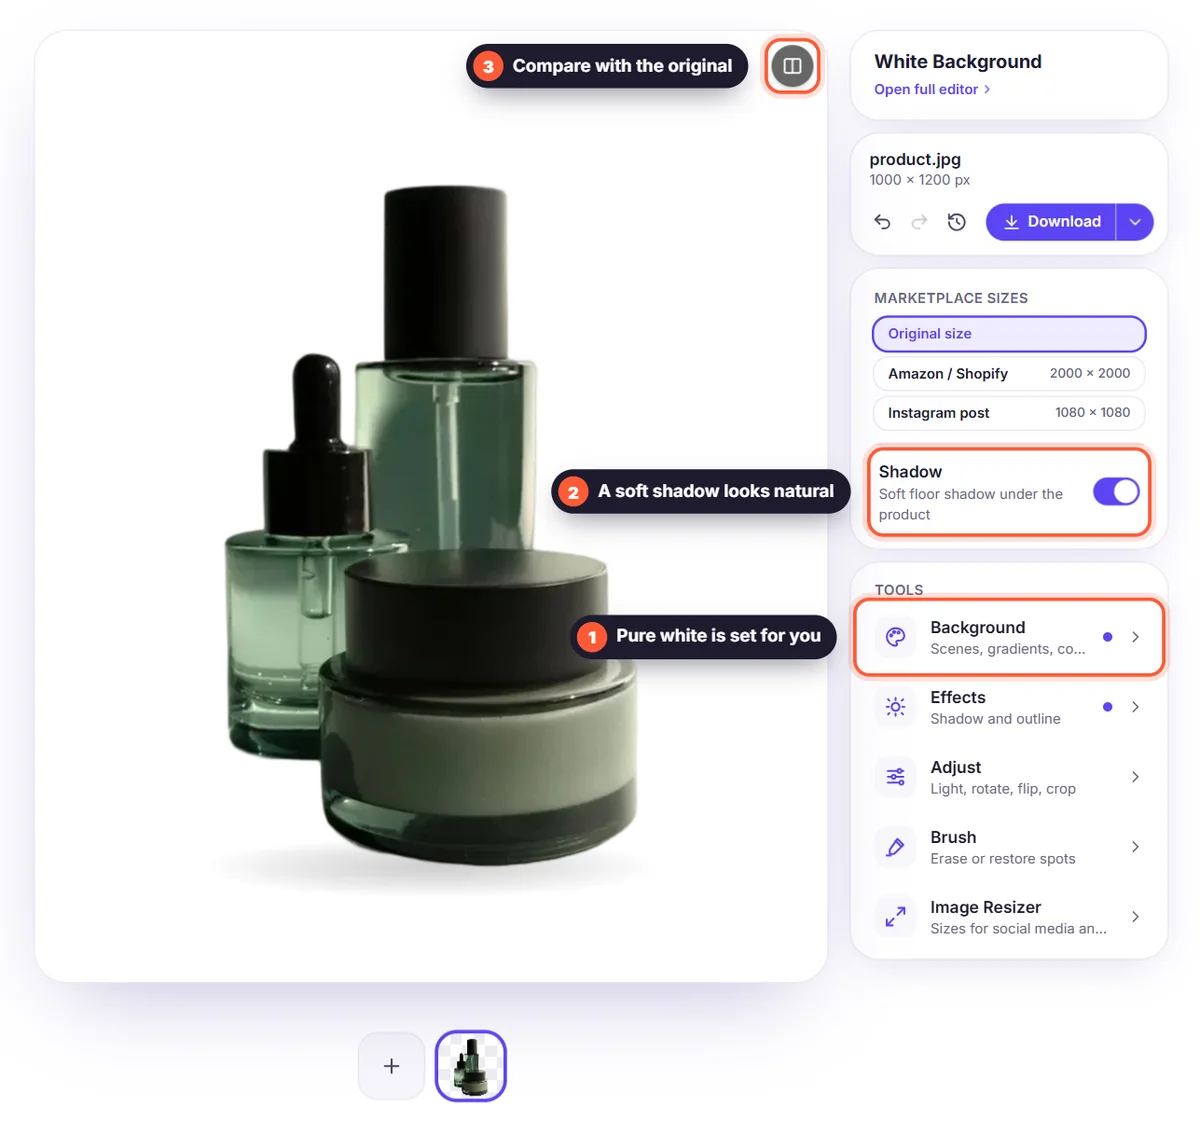
Step 4: Crop and size the image
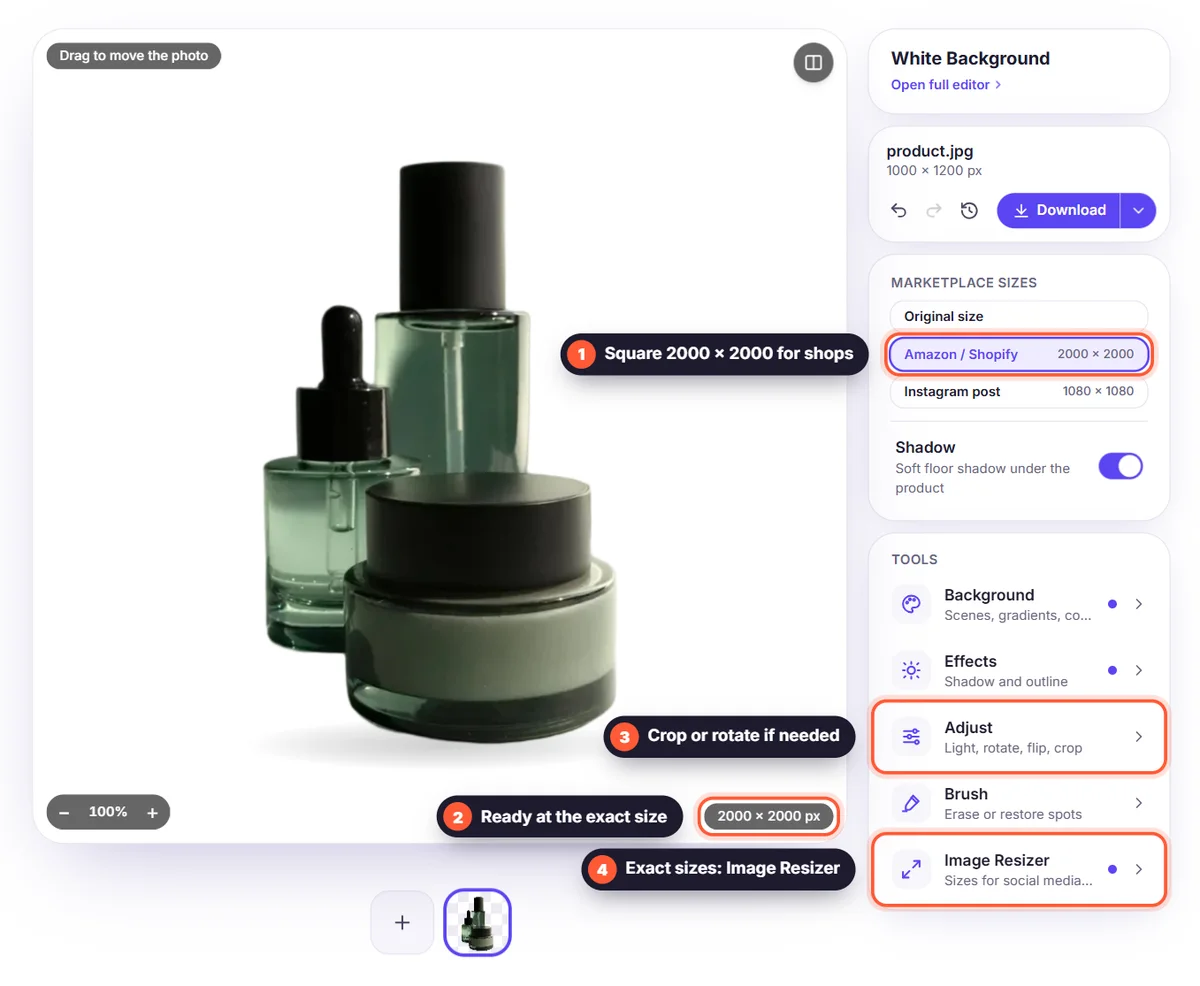
Use Adjust → Crop to subject to remove empty space, then the Padding slider to leave an even margin around the product. Most marketplaces want the product to fill a large part of the image. Then open the image resizer and choose the Amazon / Shopify preset, a 2000 × 2000 px square that is large enough for zoom on most shops. Use Fit so the whole product stays visible, with white filling the rest.
Step 5: Download
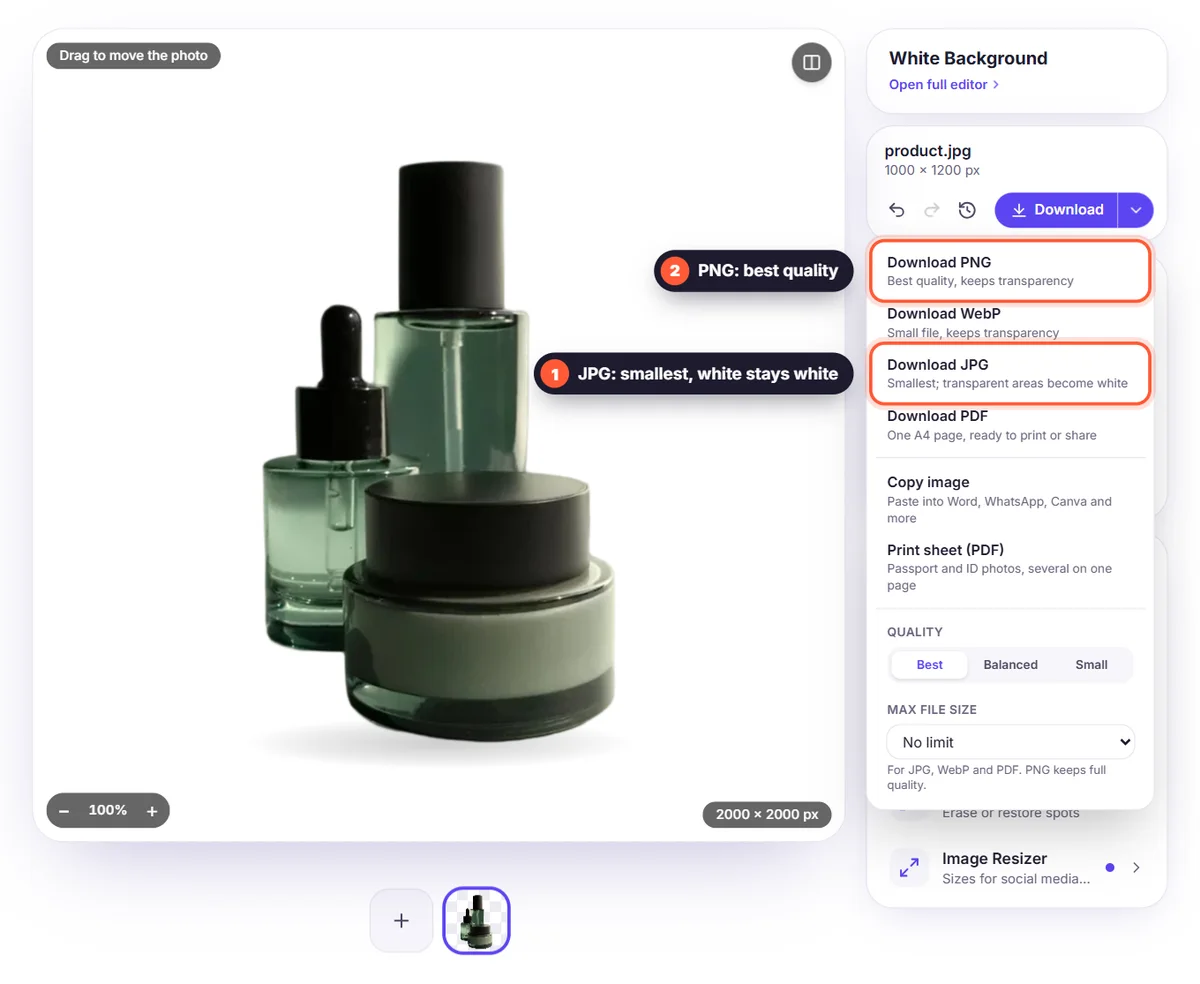
Download as JPG for a small file with a white background, or as PNG if you want to keep the transparent version for later. If your shop has an upload limit, set Max file size in the Download menu. For a product sheet or catalogue, use "Download all as one PDF" to get every photo in one file.
Marketplace image requirements at a glance
Rules change, so always check the latest seller guidelines, but these are the common requirements:
- Amazon: the main image must have a pure white background, show only the product being sold, and the product should fill most of the frame. Large images (at least 1000 px on the longest side) enable zoom.
- Etsy: no strict white rule, but clean, consistent photos perform best. Square or 4:3 images display well in search results.
- Shopify and WooCommerce: your theme decides the shape. Use the same square or portrait size for every product so collection pages look tidy.
- eBay and Google Shopping: plain, light backgrounds without text, watermarks or borders are recommended.
Process a whole catalogue at once
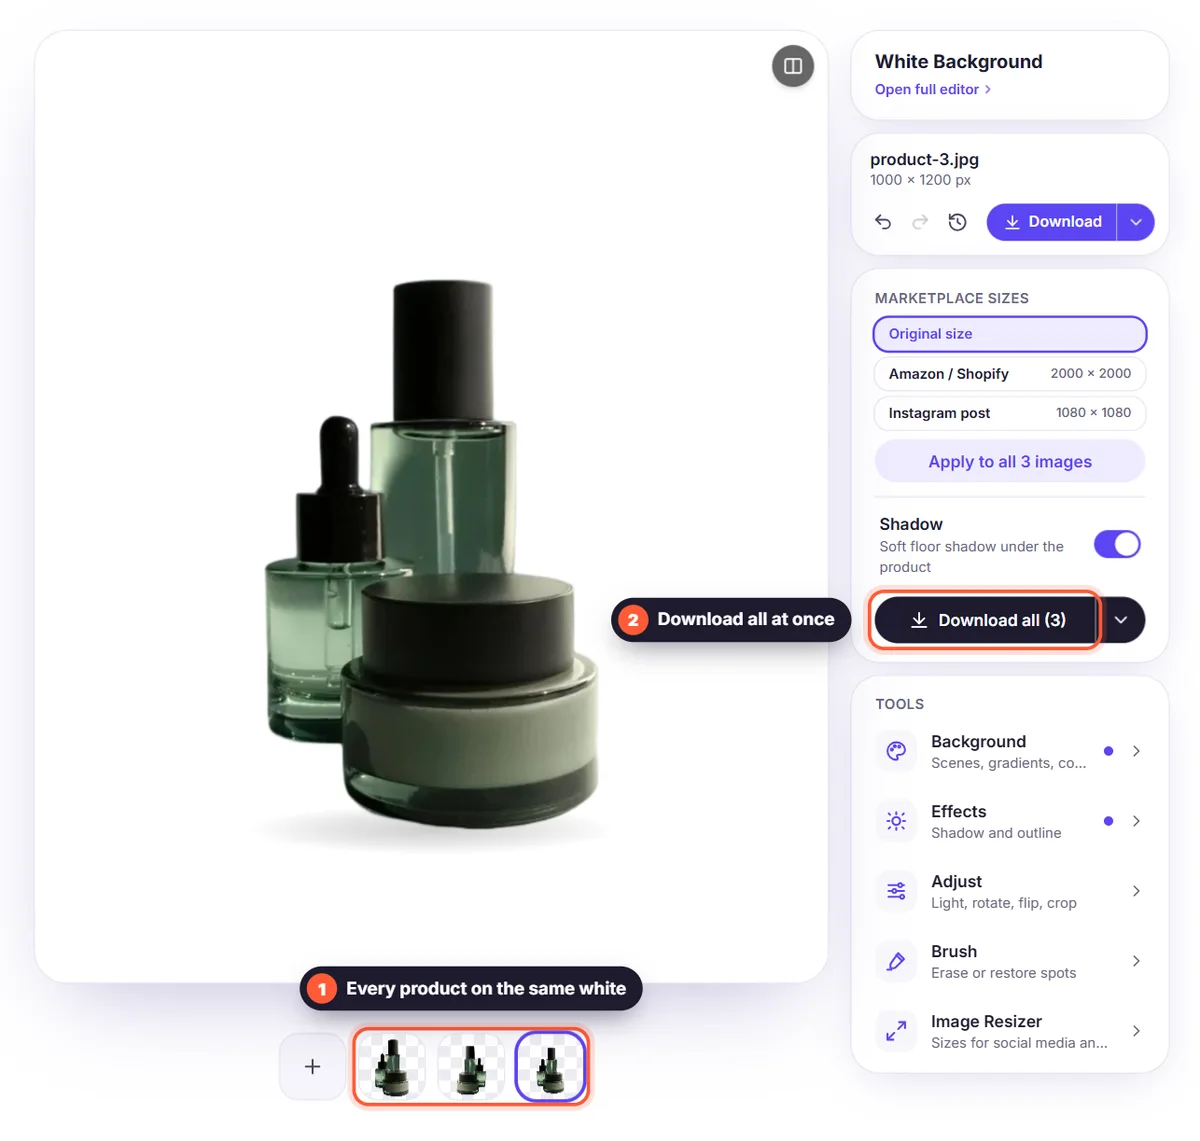
You can add many photos to the editor; they are processed one after another and shown below the editor, so you can switch between them. Set the background and size on one image, then use Apply to all in the Image Resizer to give every photo the same size. When they're done, Download all saves them as one ZIP file, or as one PDF with a page per image.
Tips for a consistent catalogue
- Shoot all products from the same angle and distance.
- Use the same light for every photo, ideally at the same time of day.
- Use the same background colour and shadow strength for the whole catalogue.
- Keep the same margin around every product, so they look the same size on the page.
- Add a few lifestyle photos as extra images: the product in use, on a coloured background or in a scene. See creative ideas for cutouts in marketing.
Common mistakes that make product photos look cheap
- Grey instead of white: a photo of a white wall or sheet is never pure white. Replacing the background in the editor gives a true, even white.
- No shadow at all: a product floating on white looks pasted. A soft floor shadow grounds it.
- Wrong colours: yellow room lights or a coloured wall reflecting onto the product. Shoot in daylight and check the colour against the real product.
- Too small in the frame: the product should fill most of the image, so shoppers can see details and zoom in.
- Different sizes and angles: a catalogue where every photo has a different margin and angle looks messy. Use the same preset and padding for every product.
Beyond white: images that convert
The white main image gets the click; the extra images close the sale. Once you have a clean cutout, reuse it: put the product on a soft brand-coloured gradient for a banner, on a Scene such as Studio warm for social media, or combine it with a lifestyle photo using the Photo background. Show the product from several angles, add a close-up of the most important detail, and one image that shows its size, for example next to a hand or a common object. Our guide on social media image sizes helps you export each version at the right size.
Frequently asked questions
Is pure white the same as light grey? No. Marketplaces that require white mean pure white (RGB 255, 255, 255). Choosing white in the editor gives exactly that, unlike a real white wall, which always shows some grey.
Should I download JPG or PNG? JPG for the white-background version you upload to your shop, because it's smaller. Keep a PNG with transparency so you can put the product on other backgrounds later.
Can I use the photos commercially? Yes. You keep all rights to your images and the results, with no watermark.
My product is white. Will it disappear on a white background? The cutout keeps the product, but a white product on white can look flat. Add a soft floor shadow, or use a very light grey background for the extra images.
What about shiny or glass products? Check the edges carefully and touch them up with the Brush. Reflections of the room can remain on the product itself; shoot with a plain white sheet around the product to keep them neutral.