
A transparent PNG is an image without a background: only the subject is visible, and whatever sits behind it on a page, slide or design shows through. Logos, product photos, stickers, signatures and design elements all need one. Here's how to make the background of any image transparent for free, even if you start with a JPG, how to check that the result is really transparent, and which format to save it in.
What does "transparent" mean in an image?
Every pixel in an image has a colour. Formats like PNG and WebP can also store how see-through each pixel is, called the alpha channel. In a transparent PNG, the background pixels are fully see-through and the subject pixels are solid. Edge pixels, such as hair or soft shadows, can be partly transparent, which is what makes a good cutout blend smoothly into a new background.
Why you can't simply convert a JPG to a transparent PNG
JPG files have no transparency at all: every pixel has a colour, including the background. Renaming the file or saving it as PNG doesn't change that: you get a PNG with the same white or coloured background. It's also why some "transparent" PNGs found online still show a checkerboard pattern baked into the picture. To get real transparency, the background has to be erased first.
Make the background transparent in 3 steps
- Upload your photo to the online background remover. JPG, PNG and WebP images up to 15 MB all work.
- Click Remove background and wait a few seconds while the AI separates the subject from the background.
- Click Download and choose PNG. The background is now truly transparent.
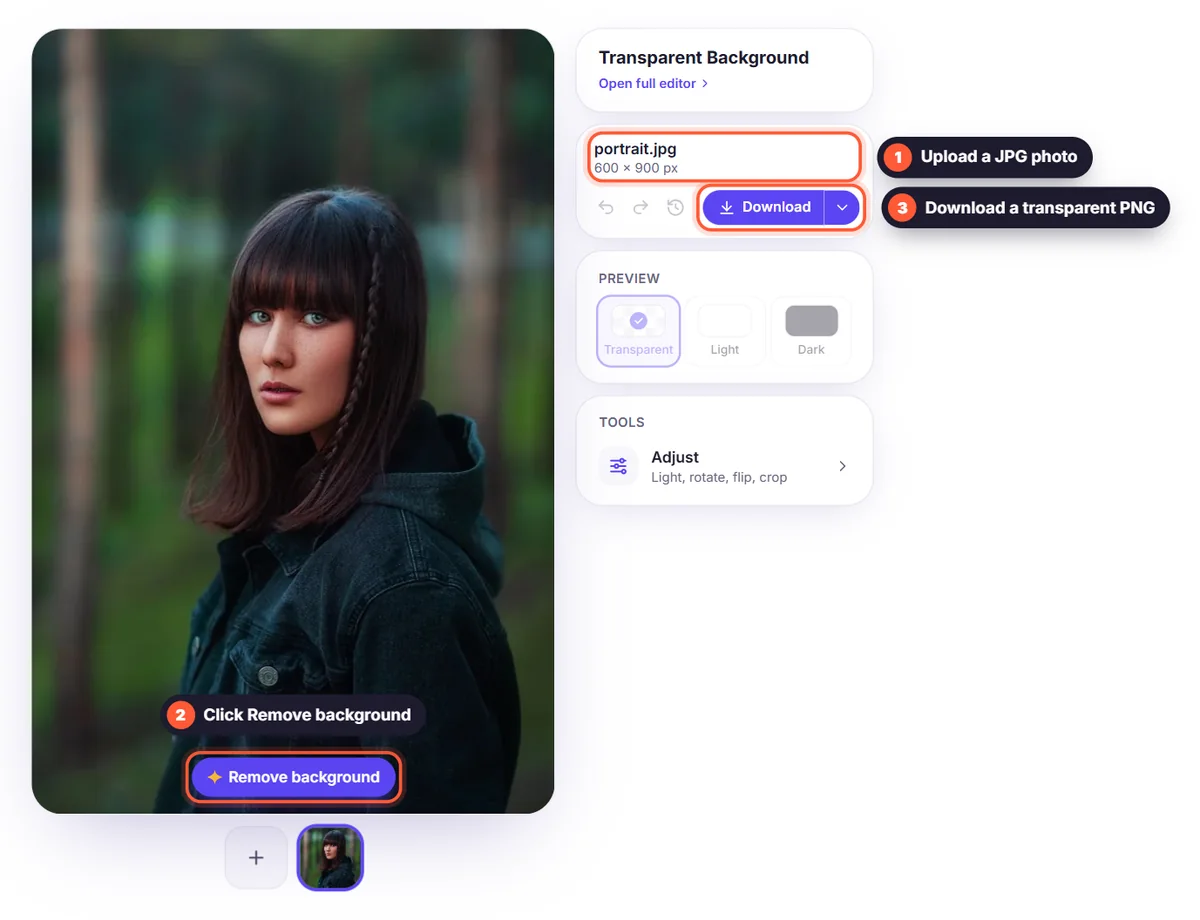
It's free, there's no account, and the result has no watermark. You can also paste an image with Ctrl+V or drop it anywhere on the page.
Clean up the edges
For most photos the result is ready immediately. If you see a leftover bit of background, open Brush, choose Erase and paint over it. If part of the subject was removed, such as the handle of a bag or a strand of hair, switch to Restore and paint it back. Our guide on how to fix cutout edges shows this step by step. For very difficult photos, start from the largest, sharpest version you have.
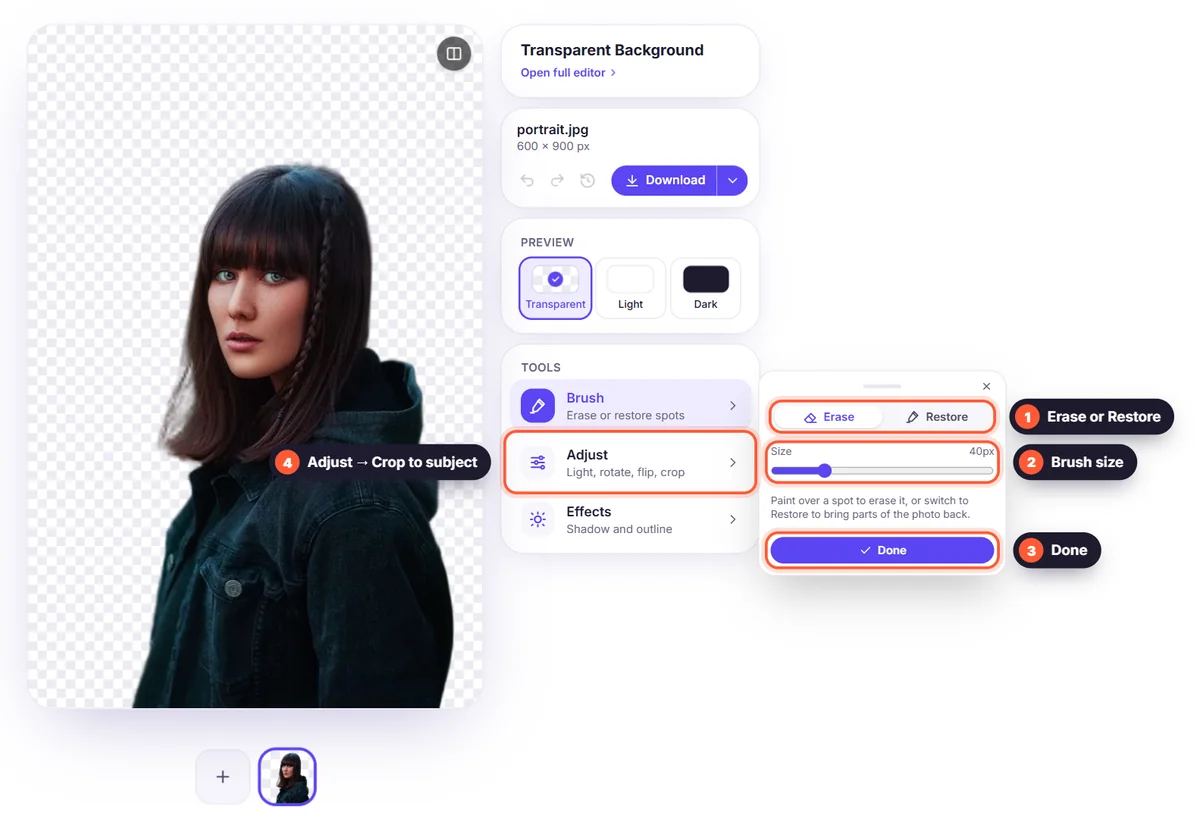
To remove the empty space around the subject, use Adjust → Crop to subject. The image is then exactly as big as the subject, which makes it much easier to place in a design.
How to check that your PNG is really transparent
In the editor, transparent areas show a grey-and-white checkerboard. After downloading, place the image on a coloured background, for example in a document, a slide or a design tool. If the colour shows all around the subject, the PNG is transparent. If you still see a checkerboard or white around it, the background was not removed, or you opened a different file.
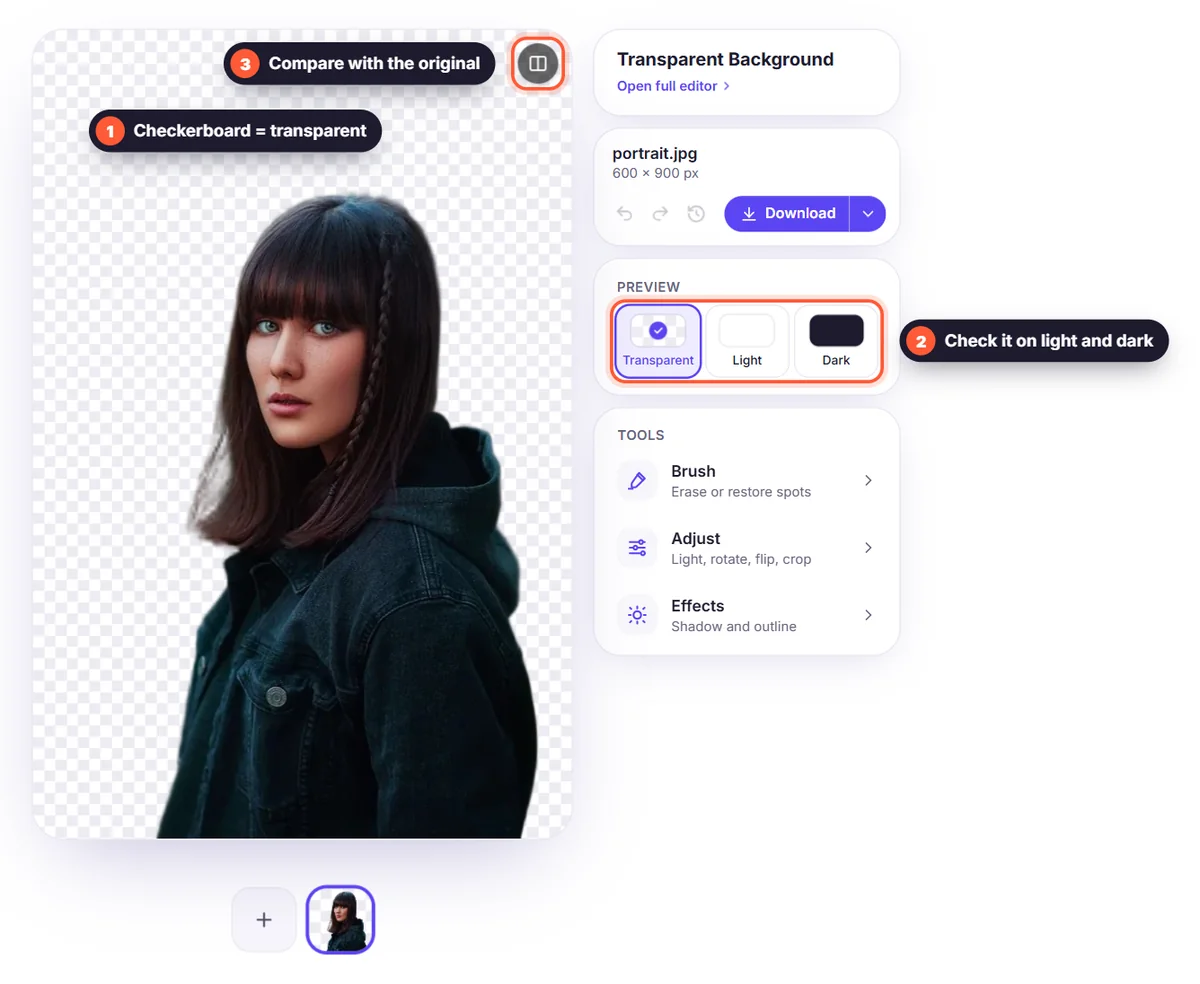
Note that some apps show transparent areas as white or black when they preview an image, for example a photo gallery on a phone. That doesn't mean the transparency is gone. Insert the image into a document or design to see it properly.
Transparent PNG or WebP?
Both formats keep transparency. PNG is lossless and works in every app, so it's the safest choice for editing, printing and sending to others. WebP files are much smaller and ideal for websites, where every kilobyte counts. JPG is the only one of the three that can't be transparent: transparent areas become white. Our format guide explains when to use which.
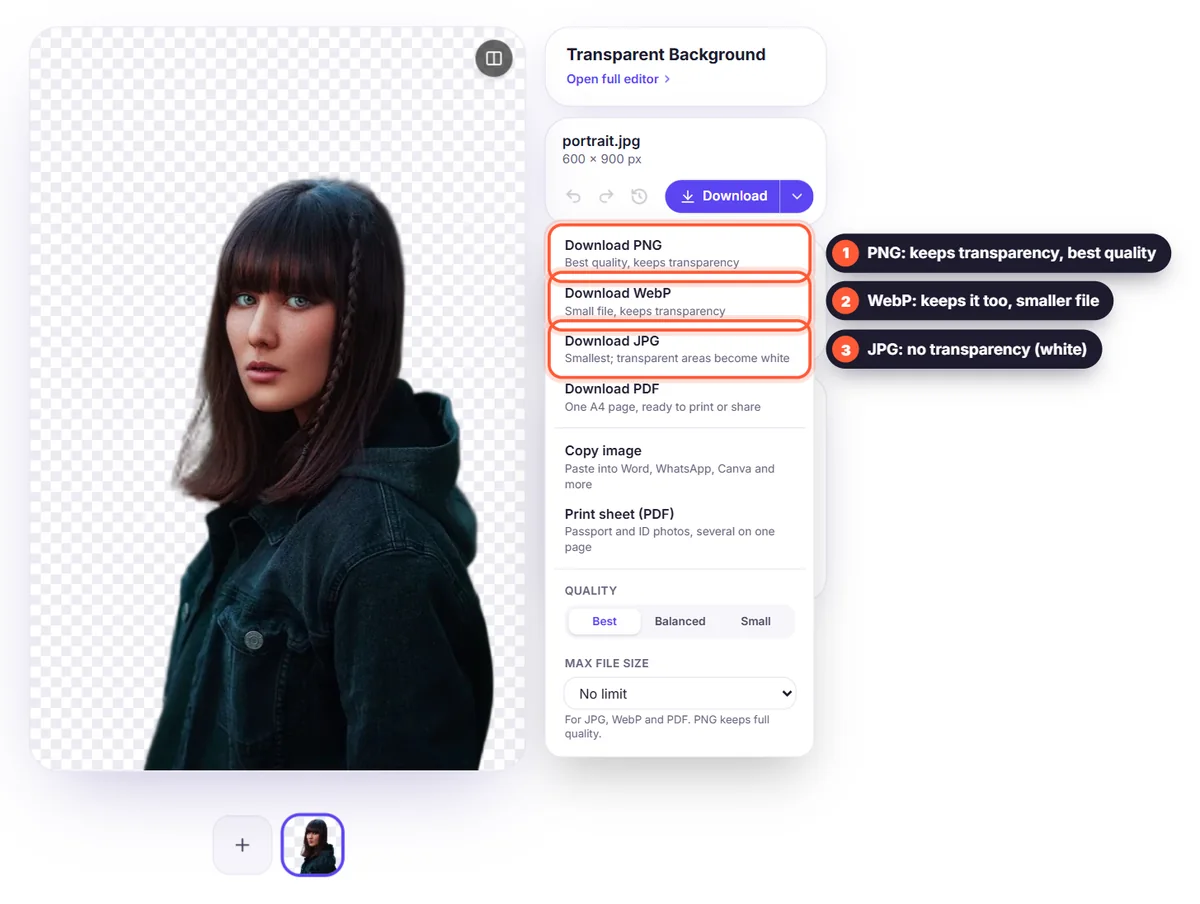
- PNG: best quality, keeps transparency, larger file. Use it for logos, signatures, editing and print.
- WebP: keeps transparency in a much smaller file. Use it for websites and online shops that accept it.
- JPG: smallest, no transparency. Use it only when you've put the subject on a solid background.
How to use a transparent PNG
- Word and Google Docs: insert the image and set the text wrapping to "In front of text" to place it freely.
- PowerPoint and Google Slides: insert it on any background colour or photo; the slide shows through.
- Canva and other design tools: upload the PNG as your own image and layer it over backgrounds, text and shapes.
- Websites: use WebP or PNG; the page background shows behind the subject automatically.
- Quick paste: choose Copy image in the Download menu and paste it straight into another app.
Popular uses for transparent images
- Logos and signatures on documents. See the guides for logos and signatures.
- Product photos for online shops and marketplaces.
- Stickers: add a white Outline in Effects for the classic die-cut sticker look.
- Thumbnails, social media posts and ads.
- Presentations, posters, collages and greeting cards.
Keep the quality high
You download the result in full quality; very large photos are scaled to 2,560 pixels on the long side. Start with the sharpest, largest version of the image you have: a transparent PNG can't add detail that wasn't in the original. If you need a specific size, use the image resizer before downloading rather than stretching the image later in another app.
Transparent stickers and cut-outs for social media
Stickers are one of the most popular uses for transparent images. Remove the background, then open Effects and add an Outline: Thin, Medium or Thick, in white or any colour. The white border gives the classic die-cut sticker look and keeps the subject readable on any background, from a busy Instagram Story to a dark chat window. Download as PNG to keep the outline and the transparency.
For messaging apps that support custom stickers, keep the image square and not too large; the Instagram post preset (1080 × 1080 px) in the image resizer is a good starting point, and you can reduce it further with a custom size. For printed stickers, use the largest size you have and check the outline at 100 % zoom.
Common problems with transparent PNGs
- A white halo around the subject: the original background was white and some edge pixels kept a little of it. Use the Brush to erase the halo.
- Missing parts: the AI decided something belonged to the background, such as a chair or a bag. Bring it back with Restore.
- Huge file size: PNG is lossless. Use WebP for websites, or make the image smaller with the resizer.
- Transparency lost after editing elsewhere: the other app saved it as JPG. Export as PNG from that app too.
Frequently asked questions
Can I make a JPG transparent? Not as a JPG. Remove the background, then download as PNG or WebP. Both keep the transparency.
Why is my transparent PNG showing a black background? Some viewers display transparency as black or white. Place the image in a document or design to check it; the transparency is still there.
Can I make only part of an image transparent? Yes. Use the Brush in Erase mode to remove any area you want, and Restore to bring parts back.
Is a transparent PNG bigger than a JPG? Usually yes, because PNG is lossless. If size matters, choose WebP, which keeps the transparency in a much smaller file.
Can I make several images transparent at once? Yes. Add them all; they're processed one after another, and Download all saves them in one ZIP file.