
A transparent signature lets you place your handwritten signature on contracts, letters, invoices and email footers without a white or grey box around it. It looks like you signed the page with a pen, not like a pasted photo. With a signature background remover you can make one from a phone photo in about a minute, for free and without installing anything. This guide shows how to get a clean result, how to use the signature in Word, Google Docs and PDFs, and how to keep it safe.
What is a transparent signature?
It's an image of your signature where only the ink is visible: the paper around and between the strokes is removed and replaced with transparency. When you place it on a document, the page shows through everywhere except the ink, so it blends in naturally, on white paper, on a coloured letterhead or on top of a signature line.
Step 1: Sign and take a good photo
- Sign on clean, plain white paper with a dark pen. Black or dark blue works best; thin, light pens are harder to separate from the paper.
- Sign a little larger than usual. A bigger signature gives more pixels and sharper strokes when it's scaled down in a document.
- Photograph it in even daylight, holding the phone parallel to the paper to avoid shadows and distortion. Turn off the flash: it creates a bright spot and a glare on glossy ink.
- Crop the photo close around the signature before uploading, leaving a small margin.
A scanner gives an even better result if you have one: scan at 300 dpi or more, in colour or greyscale, and save the file as PNG or JPG.
Step 2: Remove the signature background
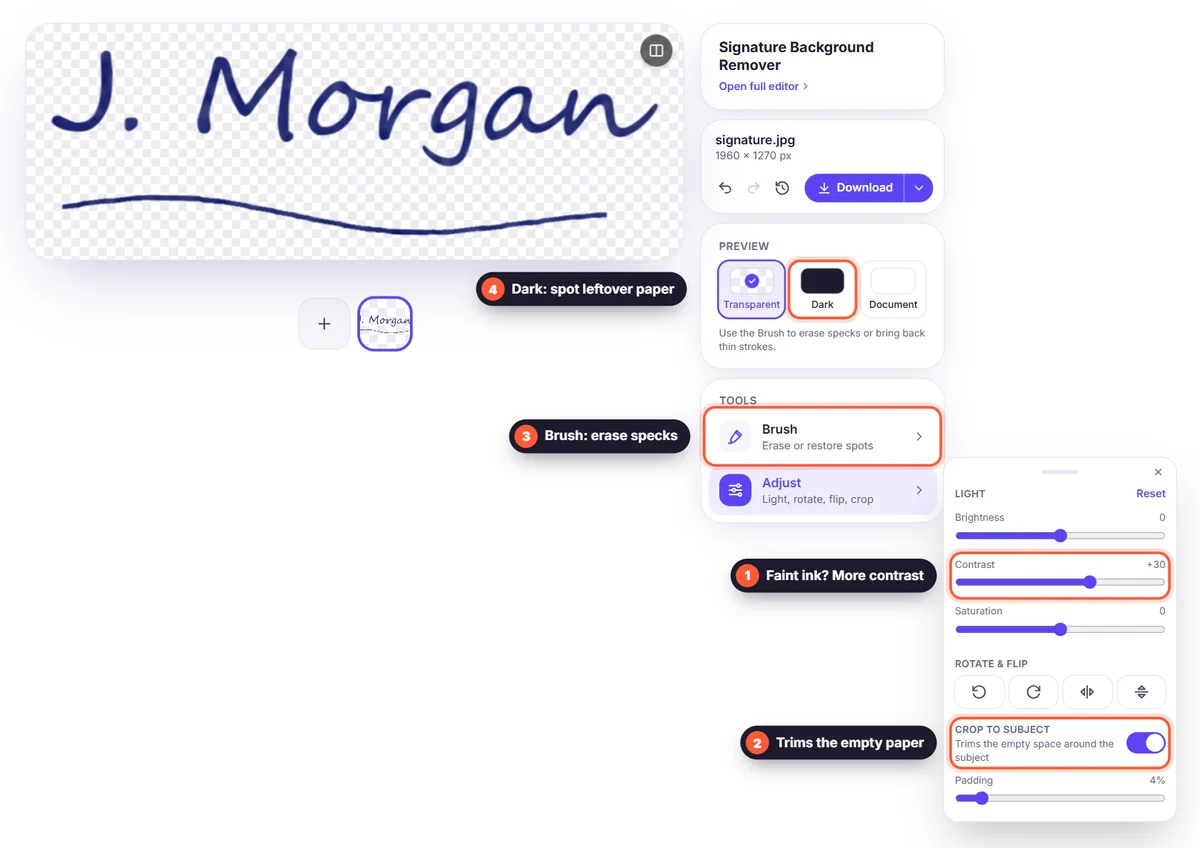
Upload the photo to the free background remover. The AI keeps the ink and removes the paper, leaving your signature on a transparent background. Switch the background to a dark colour in the editor to check that no paper remains around the strokes or inside small loops, like the inside of an "a" or an "o".
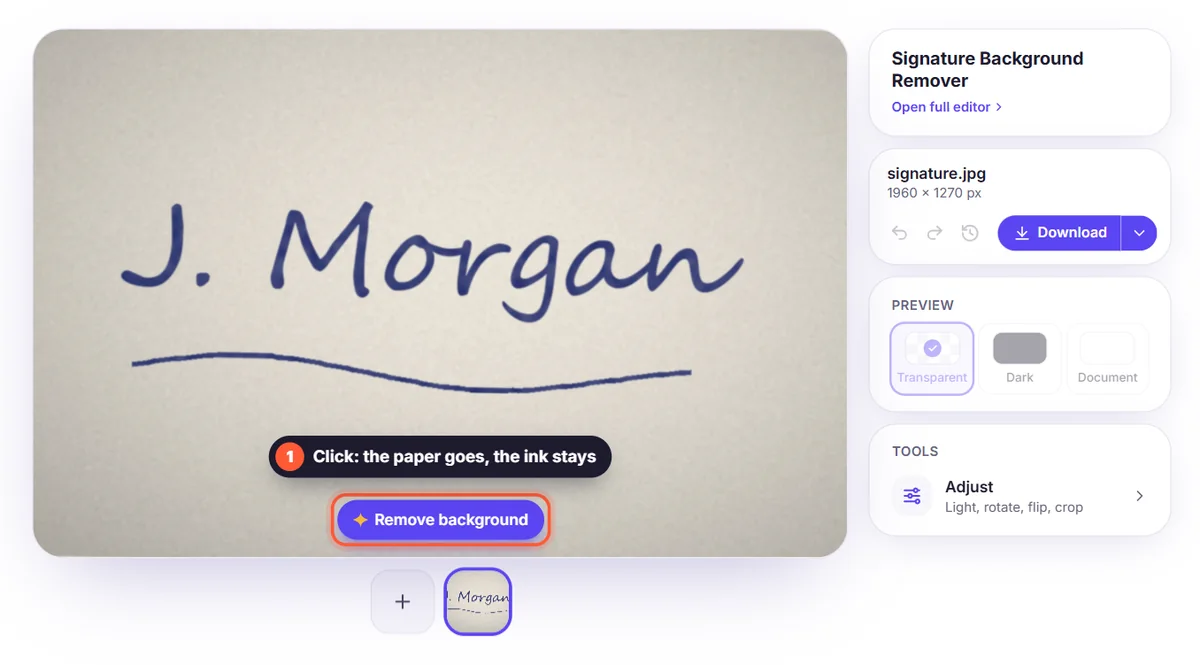
If a small spot of paper or a shadow remains, open Brush, choose Erase and paint over it. If part of a thin stroke disappeared, switch to Restore and paint over it to bring it back. Then use Adjust → Crop to subject to trim the empty space around the signature, so it's easy to position in your document.
Step 3: Download as a transparent PNG
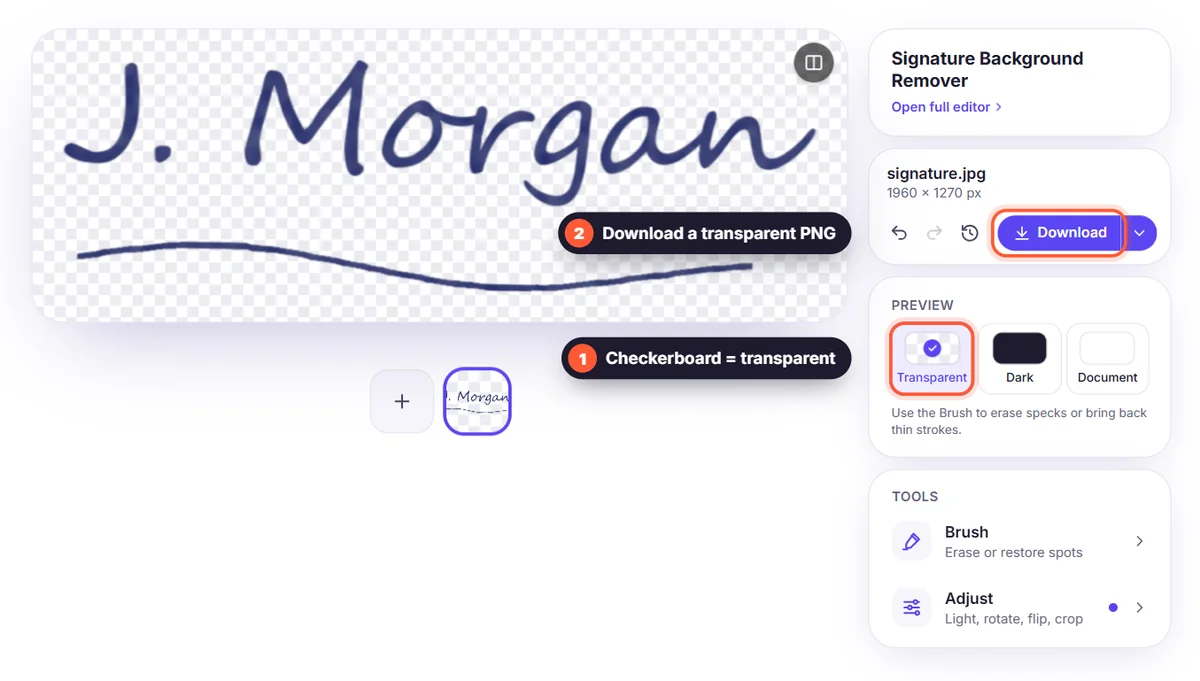
Download the signature as a PNG to keep the transparency at full quality. Don't choose JPG: JPG can't be transparent, so the background would turn white again. WebP also keeps transparency, but PNG works in more programs. Read PNG, JPG or WebP if you want to know why.
How to add your signature to a document
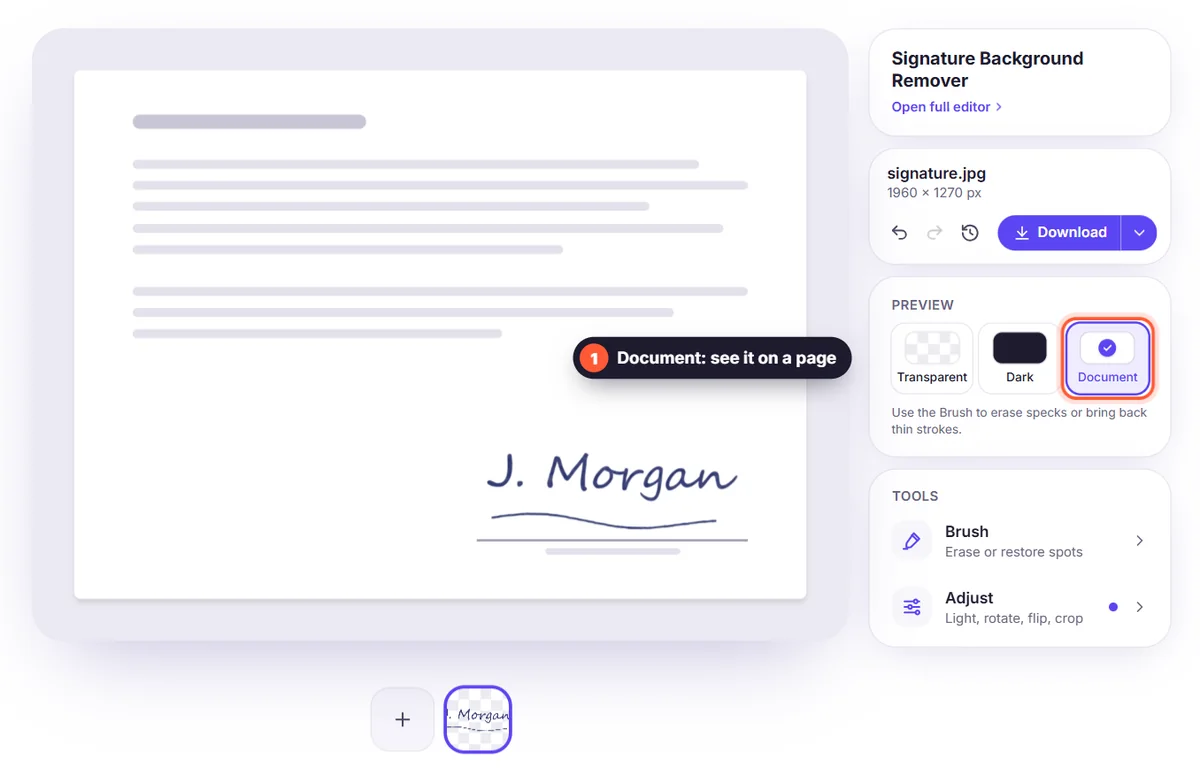
- Microsoft Word: Insert → Pictures → choose the PNG. Set the layout to "In front of text" so you can drag it onto the signature line, and resize it from a corner so it keeps its shape.
- Google Docs: Insert → Image → Upload from computer. Choose "In front of text" in the image options to move it freely.
- PDF files: most PDF editors and readers (Adobe Acrobat, Preview on Mac, and many free tools) let you add an image or a saved signature. Use your transparent PNG as the signature image.
- Email signature: in Gmail or Outlook settings, add an image to your signature and keep it small, around 150–250 pixels wide.
- Copy and paste: in the Download menu, choose Copy image and paste it straight into Word, Google Docs or an email.
Tips for a crisp signature
- Use the highest resolution your camera allows: thin pen strokes need pixels.
- Avoid lined, squared or textured paper, which can be mistaken for part of the signature.
- If strokes look faint, sign again with a thicker pen rather than over-editing the photo.
- Keep the ink colour natural: a blue signature looks more like real ink on a printed document than a perfect black one.
- Check the result on white and on a dark background before you use it, so you notice any leftover paper.
Transparent signature or electronic signature?
An image of your signature is fine for everyday documents: letters, quotes, invoices, internal forms and email footers. For contracts with legal weight, many organisations use certified electronic signature services, which record who signed, when and from where. If a document says it needs a "qualified" or "certified" electronic signature, an image isn't enough; use the service the sender asks for.
Keep your signature safe
A signature image is personal, so treat it like a key. Your images are processed only to remove the background and are then discarded, never stored on our servers. Read our privacy policy for the details. After downloading, keep the PNG in a private folder, don't post it publicly, and only paste it into documents you actually send. When you share a signed document, send it as a PDF rather than an editable file, so the signature can't easily be copied out.
Common problems and how to fix them
- Grey haze around the strokes: the paper was in shadow. Take the photo again in brighter, even light, or erase the haze with the Brush.
- Broken or missing strokes: the pen was too light or the photo too small. Sign again with a darker, thicker pen and photograph it closer.
- Lines from the paper remain: you used lined or squared paper. Sign on plain white paper and start again; it's faster than erasing every line.
- Jagged edges when the signature is enlarged: the source image was too small. Use the full camera resolution or a 300 dpi scan.
- The signature is tilted: use Adjust to rotate it, or simply take the photo again with the paper straight.
Make several versions
It's worth keeping a few variations of your signature ready: a full signature and your initials for paraphing every page, a dark version for white paper and, if you often sign on dark backgrounds such as presentation slides, a light version. Save them together with clear file names, such as "signature-full.png" and "signature-initials.png", in a private folder. Resize a copy for your email footer with the image resizer, so the file stays small and loads quickly for the people you write to.
Before using a new signature image on an important document, print one test page. Check that the size looks like a real handwritten signature, usually about 4–6 cm wide, and that no grey edges show on paper.
Frequently asked questions
Is a signature background remover free? Yes. Removing the background and downloading the transparent PNG is free, with no account and no watermark.
Can I do it on my phone? Yes. Take the photo, open the site in your mobile browser and follow the same steps. See how to remove a background on your phone.
Why does my signature have a white box around it? It was saved as JPG, or the file you inserted is the original photo. Download the result as PNG and insert that file.
My signature looks blurry in the document. What can I do? Start from a sharper, larger photo or a scan, and don't stretch the image larger than its original size in your document.
Can I change the colour of my signature? Keeping the original ink colour looks most natural. If you need pure black, sign with a black pen and take a new photo; that gives a cleaner result than recolouring.